
Step-by-step guide to configure the Activaire Q-SYS plugin
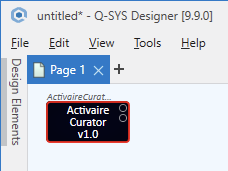
1. After dragging the plugin's item from Schematic Elements and dropping it to a Schematic Page, the plugin's Schematic Element will look like this:
and the plugin's Properties will look like this:

Set up the Audio Players for your Q-SYS plugin
2. The "Audio Players" property is a number between 1 and 128

and it stands for the number of Audio Player components embedded in the plugin. The initial value is 2, which means that the plugin initially incorporates only 2 Audio Players
![]() which can be inspected when choosing "Check Design..." from the File menu. Also, the initial number of Audio Pins of the Schematic Element matches this value
which can be inspected when choosing "Check Design..." from the File menu. Also, the initial number of Audio Pins of the Schematic Element matches this value 
3. The number of Audio Player components that the plugin uses changes accordingly, and so does the number of its Audio Pins, upon incrementing the value of this property

![]()

and upon decrementing the value of this property

![]()

Set up the Event Log for your Q-SYS plugin
4. The "Event Log" property is an enum consisting of the following choices

of which "None" is the default one. This property controls the Event Logger component embedded in the plugin. When set to "None", no event gets logged in Event Log within Q-SYS Core Manager. When set to "Error", only error events are logged, which looks like this:
![]()
When set to "Warning", both error & warning events are logged, looking like this:

When set to "Normal", all events are logged:

5. The format of these events' message is ACT|<severity>|<class>: <detail>, where <severity> is one of:
- E - for error
- W - for warning
- I - for info
<class> is one of:
- ALR - for auto login recovery
- FS - for file system
- IO - for internet outage
- IR - for internet restored
- LCR - for load container recovery
- MP - for menu parse
- OT - for option tap
- PMR - for pause music recovery
- PS - for plugin status
- PT - for playable tap
- QC - for queue completed
- RA - for remote action
- REQ - for send request
- RES - for response handler
- SPR - for start playback recovery
- TR - for token renewal
- ZT - for zone tap
and <detail> contains custom information associated with the event, describing it..
Set up the Debug Print for your Q-SYS plugin
6. The "Show Debug" standard property is a boolean value

which enables/disables the plugin's console. Its default value is "No". For Activaire Curator's Q-SYS plugin, this property also controls the visibility of another property called "Debug Print"

which appears when "Show Debug" is set to "Yes", and it disappears when "Show Debug" is set to "No".
7. The "Debug Print" property is an enum consisting of the following choices

of which "None" is the default one. This property controls the type of data that gets logged to the plugin's console. When set to "None", no data is logged to the console. When set to "Tx", only data pertaining to outbound network requests gets logged

Symmetrically, when set to "Rx", only data on inbound network responses gets logged

When set to "Tx/Rx", both inbound & outbound network communication appears in the console

When set to "Function Calls", the plugin logs some of the important function calls

When set to "FS", which stands for "File System", only FS-related plugin actions get logged to the console

When set to "Playback", the plugin constantly logs the remaining seconds for each active playback session

When set to "Flow", all type of events (error, warning & normal) are logged to the console

Finally, when set to "All", all previously described type of data get logged to the console.
Manage the Control Pins for your Q-SYS plugin
8. The plugin has 6 main categories of Control Pins

pertaining to its 5 pages:
- Setup
- Zones
- Music Library
- Now Playing
- Feedback
while the last category is for Scheduling.
9. The Control Pins for the first page of the plugin, the Setup page, are these

10. The Control Pins for the second page of the plugin, the Zones page, are these

11. The Control Pins for the third page of the plugin, the Music Library page, are these

12. The Control Pins for the fourth page of the plugin, the Playback page, are these

13. And the Control Pins for the last page of the plugin, the Feedback page, are these

14. And the Control Pins for Scheduling are these
